
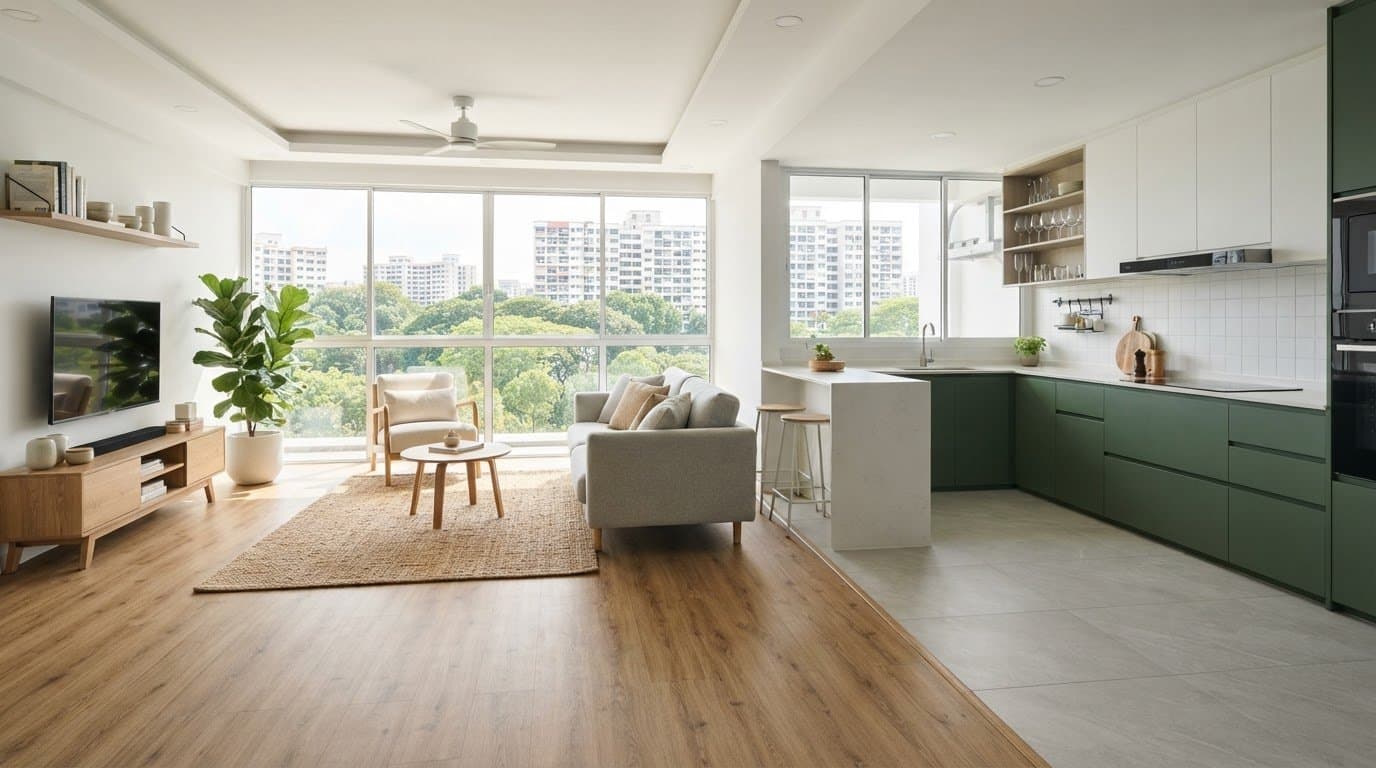
Vinyl Flooring vs Tiles for HDB: Compare Costs, Comfort and Durability
Compare vinyl flooring vs tiles for HDB homes by comfort, durability, moisture suitability and installation factors to choose the right finish for each room.
The flooring that lasts longer may not be the one you most enjoy living with. In a vinyl flooring vs tiles for an HDB flat comparison, quality tiles can last 25 years or more with proper care, while quality LVT typically lasts 15 to 25 years depending on wear-layer thickness and foot traffic. Vinyl usually feels warmer and softer underfoot, so the best fit depends on how you use each room.
It’s understandable to focus first on durability and upfront cost. But day-to-day comfort, moisture exposure, upkeep and the look you want matter too. Tiles resist water and often suit wet areas; vinyl can be comfortable in dry living spaces, but its joints and the condition of the floor beneath it affect performance.
This comparison covers how vinyl and tiles differ in installation, comfort, moisture suitability, design and resale perception. You’ll also see why a mixed approach, with tiles in wet areas and vinyl in dry rooms, may make more sense than using one material throughout the flat. Resale preferences vary, so consider the overall finish and how well it suits the home, not just the flooring material.
Key Takeaways
- Compare the full installation scope, including subfloor preparation and removal of existing flooring, rather than judging by material choice alone.
- Consider how each floor feels and sounds in daily use, especially in rooms where you spend the most time standing or walking.
- Match flooring to moisture exposure and room function; wet areas call for different considerations from dry living spaces.
- Assess whether your existing tiles are suitable for an overlay before planning to install vinyl without hacking.
- Choose a finish that suits your design preferences and the overall impression you want your home to make.
Table of Contents
- Installation labour and subfloor preparation costs
- Comfort, warmth and noise underfoot
- Is vinyl flooring waterproof and suitable for Singapore’s humidity?
- Can I install vinyl flooring over existing tiles in my HDB flat without hacking?
- Design options and resale perceptions
- FT2 Interior Design: HDB BTO Home Renovation
Installation labour and subfloor preparation costs
Vinyl and tiles require different installation steps, so compare the work involved as well as the materials. A clear, room-by-room scope helps you understand the preparation, fitting and removal each option requires.
Subfloor Preparation and Underlay
Subfloor preparation creates a stable base for the finished floor. Vinyl needs a level surface; cement screed may be used if levelling is needed. A separate underlay is a distinct layer beneath the flooring, and whether it is used depends on the selected system. Tiles also need a prepared base before they can be laid and grouted.
Start by recording the existing floor condition in each room. Note visible cracks, raised edges, uneven areas and the material at doorways. These observations help identify where preparation may differ across a resale flat. Plan the flooring room by room, especially where the finish changes between living spaces and service areas.
Installation Costs and Room Estimates
Installation labour covers fitting the chosen material; preparation, removal and disposal are separate tasks. Ask for each task to be specified by room, including whether the work involves screeding, hacking or handling removed flooring. This makes it easier to compare plans with different work sequences without assuming the material alone determines the installation scope.
A standard four-room HDB flat is estimated to have about 850-950 square feet of floor area. The actual area receiving a particular finish may be lower because bathrooms can use another material. Measure the rooms included in your plan, then record each area separately instead of applying one flat-wide estimate to every flooring choice.
| Option | Base preparation | Installation work | Planning consideration |
|---|---|---|---|
| Vinyl | Level base; screed where needed | Fit the selected flooring system | Record room transitions and floor height |
| Tiles | Prepared base for tile setting | Lay tiles, then grout joints | Include removal work if replacing existing tiles |
Vinyl can offer more renovation flexibility when it can be installed over a suitable existing floor. In that case, removal may not be part of the work. If the existing surface needs correction or removal, include those tasks in the plan rather than treating overlay as the default.
Before deciding, prepare a simple schedule listing each room, its measured area, selected material and required work. Separate fitting from preparation and removal. This gives you a practical basis for reviewing the installation plan and spotting differences between rooms before renovation begins.
Choose the option whose preparation and installation sequence suits your flat’s existing floor and renovation plan.
Comfort, warmth and noise underfoot
Flooring affects how your HDB flat feels during everyday routines. Vinyl generally feels softer and warmer underfoot than tiles, while tiles provide a firm, hard surface. You may notice the difference when walking barefoot from the living room to the kitchen or standing at the counter while preparing a meal.
For comfort, consider where you spend time standing or walking. A softer surface can feel more forgiving in bedrooms and living areas, especially if you often go barefoot. Tiles may suit you if you prefer a solid, cool-feeling floor. Think about your routine, not just how each material looks in a sample.
Room temperature also affects how flooring feels. In an air-conditioned Singapore home, tiles can feel cooler underfoot than vinyl. Vinyl may feel warmer by comparison, but it doesn’t control the room’s temperature. If you’re choosing flooring for a bedroom, compare how each sample feels after it has been in the room for a while.
Sound is another practical difference. Footsteps, a dropped toy or a chair dragged across a hard surface can create impact noise. Vinyl flooring with acoustic underlayment feels warmer and more comfortable underfoot than tiles, and reduces impact noise transmission. The underlayment matters, so assess the complete flooring system rather than judging the vinyl surface alone.
Acoustic underlayment can soften footsteps within a room, but it isn’t the same as soundproofing the whole flat. Noise also depends on the activity and the floor construction beneath the finish. For example, a child running across the living room creates a different impact from someone walking carefully in bedroom slippers.
Try a simple room-by-room test before deciding. Place vinyl and tile samples on the existing floor, then walk across each barefoot and in shoes. Stand in one spot for a few minutes, move a chair and listen to the difference. Repeat the test in a bedroom, living area and kitchen, where routines and comfort needs can vary.
- Choose vinyl for a softer feel: Consider bedrooms and living areas where you often walk barefoot.
- Choose tiles for a firm surface: Compare how the harder feel suits your daily routines.
- Compare the full vinyl system: Include its acoustic underlayment when judging comfort and impact noise.
For a considered vinyl flooring vs tiles for HDB decision, rank comfort, temperature and sound by room. If quieter footsteps matter most in your living area, test vinyl with its underlayment. If you prefer a firm, cool surface, compare tiles directly. Trying each sample underfoot is more useful than judging appearance alone.
Is vinyl flooring waterproof and suitable for Singapore’s humidity?
Singapore’s humid climate makes moisture resistance a practical flooring concern, but “waterproof” needs context. Quality LVT and SPC flooring have waterproof cores, while click-lock joints resist surface water under normal conditions. This describes the material and its joints, not every part of the installed floor or the subfloor beneath it.
In dry rooms, vinyl can suit everyday living if spills are cleaned and the floor is installed over a sound base. Prolonged water exposure is different from a brief spill. Water can reach joints or edges, so don’t treat vinyl as a complete waterproofing system for bathrooms, shower areas or other spaces with floor traps.
Tiles are more suitable for wet areas. Ceramic and porcelain tiles resist water and stains, making them common choices for bathrooms and kitchens. However, grout between tiles is porous and can absorb moisture, stain or crack over time. In a bathroom, tile must work with the waterproofing beneath it; the tile surface alone isn’t the membrane.
Lifespan depends on material quality, installation and household traffic. Quality LVT typically lasts 15 to 25 years, depending on wear-layer thickness and use. Properly installed porcelain tile can last 20 to 30 years or more. These are different expectations, not guarantees for every flat. Heavy furniture, grit, dropped objects and poor installation can affect how either floor wears.
Maintenance differs too. Sweep vinyl to remove grit, then damp-mop it with a pH-neutral cleaner. Avoid leaving standing water around vinyl joints. For tiles, clean spills and grout regularly, as dirt and moisture can collect along the joints. A cracked tile may need individual replacement, while damaged vinyl planks or tiles can be cut out and replaced. Neither repair is invisible in every case.
Don’t assume laminate and vinyl have the same water performance. They’re different flooring categories, and “waterproof” should refer to the specific vinyl product’s stated construction. Check whether the description applies to the core, the joints or the complete installed floor. This distinction helps prevent a waterproof-core claim from being mistaken for bathroom suitability.
Use this room-by-room approach: keep tiles in bathrooms and other wet areas, then compare LVT with tiles for dry rooms. Consider foot traffic, cleaning routines and the lifespan you expect. For a wet-area renovation, discuss the tile, grout and waterproofing sequence with your renovation team before work starts.
For vinyl flooring vs tiles in an HDB flat, choose based on exposure and upkeep, not humidity alone. Vinyl can work well in dry rooms; porcelain tiles have a longer potential lifespan and are a better fit for wet areas. Match the flooring to each room’s use, then follow the appropriate cleaning routine to protect its finish.
Can I install vinyl flooring over existing tiles in my HDB flat without hacking?
Yes, click-lock vinyl can go over existing tiles when they’re sound, level and well bonded. The answer depends on the surface condition, not simply on whether tiles are present. The practical first step is to assess each room before choosing a flooring format.
Start by walking across the tiled floor and looking for loose, cracked or uneven areas. A hollow sound, visible movement or damaged tile signals that the base needs attention before installation. Check doorways and room transitions too. Adding vinyl changes the finished floor height, which can affect door clearance and the meeting point between different surfaces.
Next, match the flooring to the room’s use. In living rooms and bedrooms, vinyl offers a softer feel underfoot. For kitchens and service yards, porcelain tiles suit the demands of daily use and are easy to maintain. Bathrooms need particular care: keep tiles over proper waterproofing rather than treating vinyl as a replacement wet-area surface.
- Living room: Consider vinyl for a softer surface where household members spend time walking or sitting.
- Bedroom: Compare vinyl’s underfoot comfort with the firm feel of tiles.
- Kitchen and service yard: Consider porcelain tiles for routine cleaning and resistance to scratches and dents.
- Bathroom: Keep tiles and account for the waterproofing beneath the finished floor.
Household routines can settle close choices. A family with children may value a softer living-room floor, while a household that cooks often may prioritise a hard-wearing kitchen surface. If you have pets, consider how claws, dropped bowls and cleaning habits could affect the finish. Match the material to the activity rather than selecting one format for every room.
Before approving an overlay, follow a room-by-room sequence: inspect the existing tiles, mark damaged or uneven spots, assess floor transitions, then decide where vinyl or tiles make sense. This helps identify where the subfloor needs preparation and where the existing surface can remain. It also keeps practical issues beneath the flooring in view when you’re considering the finished look.
Overlaying avoids hacking only when the tiled surface is suitable for the new installation. If tiles are loose, cracked or uneven, address those conditions first instead of covering them. Have the renovation team explain how the planned flooring will meet adjoining floors and doorways. A clear room plan lets you balance comfort, maintenance and appearance without forcing the same material throughout your HDB flat.
Design options and resale perceptions
Flooring shapes the first impression of an HDB flat, but style alone won’t settle future buyers’ preferences. During renovation, compare the material, colour, pattern and continuity from room to room. A calm floor can complement different furniture styles, while a strong pattern may give the room a more distinctive look.
Vinyl offers wood-look and stone-look designs that echo natural materials. Ceramic and porcelain tiles have visible grout lines and a more solid surface. Compare samples beside your cabinets and wall colours. For example, grey wood-look vinyl may feel different beside warm timber cabinetry than beside white surfaces.
Tile format also changes the overall effect. Floor tiles in Singapore are commonly around 60 by 60 centimetres. Larger tiles, such as 90 by 90 centimetres and above, can create a more spacious look and mean less grout to clean. Smaller tiles have fallen out of favour in some modern interiors partly because they create more grout lines.
Existing tiles also affect design decisions. If they remain visible in adjoining rooms, choose a vinyl tone and plank direction that meet them cleanly. Check doorways and transitions, then compare samples under the flat’s lighting. A consistent palette can connect separate rooms without forcing the same material into every space.
For vinyl, look beyond the printed pattern. The wear layer affects how the surface handles daily traffic, and a 0.5 mm wear layer is cited as a practical minimum for residential living areas. Pair that specification with the design you like. A beautiful finish won’t suit a busy household if its surface is not made for the way you use the room.
Resale perceptions are subjective. Some buyers may prefer the familiar, hard-wearing feel of ceramic or porcelain tiles; others may value vinyl’s softer feel and contemporary wood appearance. Neither choice guarantees a higher resale value. Buyers also assess the flat’s overall condition, layout, maintenance and how well the finishes work together.
For a resale-minded renovation, favour a coherent design over a short-lived trend. Use large-format tiles where they suit the room, and choose vinyl patterns that complement fixed finishes. Avoid abrupt colour changes between the living room, hallway and bedrooms. These choices can make the home feel considered now and easier for future viewers to imagine as their own.
Before selecting a finish, view samples together with your existing tiles, cabinetry and wall colours. If you’re planning a full-home refresh, plan your flooring with your renovation design so the material choices support one clear look throughout the flat.
FT2 Interior Design: HDB BTO Home Renovation
FT2 Interior Design’s HDB BTO Home Renovation can help you bring flooring choices into the wider flat renovation plan. If you’re deciding between vinyl and tiles, consider each room’s use, the existing surfaces, your preferred look and the maintenance each material needs. These details help shape a consistent design rather than treating flooring as a standalone decision.
For a resale flat, the same planning can account for existing finishes and the condition of the home. FT2 Interior Design also offers HDB Resale Home Renovation, with other residential renovation options for different property types. Choose the service that matches your home and discuss how the flooring decision fits your renovation priorities.
Contact FT2 Interior Design to discuss your HDB renovation plans.
Plan the flooring as part of your next renovation step
Before finalising your flooring choice, write a short brief for each room. Note what matters most in the space, such as underfoot feel, cleaning routine, preferred look or how the floor meets adjoining rooms. This gives you a practical basis for discussing materials and finishes as part of the wider home design, rather than choosing flooring in isolation.
Choosing vinyl flooring versus tiles for your HDB flat is one piece of planning a home that fits your daily routines. FT2 Interior Design offers HDB BTO Home Renovation and HDB Resale Home Renovation, as well as Condominium Home Renovation. You can bring your room priorities into a renovation discussion and consider how each decision fits the home as a whole.
If you’re ready to plan your next step, contact FT2 Interior Design. Start with the rooms you’re renovating and the details that matter most to you. A clear brief can help turn your flooring decision into a considered part of your home plan.
Frequently Asked Questions
What should I prepare before choosing a floor finish?
Gather your flat’s floor plan, clear room photos and a list of fixed features before comparing finishes. Include built-in cabinets, door swings and areas where flooring meets another surface. Bring samples or reference images showing the look you prefer. These details provide a more useful basis for discussing the floor design than choosing from a small sample alone.
Should plank direction continue between adjoining rooms?
Not necessarily. Continuing in the same direction can link spaces visually, while changing direction may help mark a transition. Consider the doorway, room shape and position of fixed furniture before deciding. Sketch the layout on your floor plan, then view it from the main entrance and adjoining room. The right direction is the one that works with the actual layout.
How can grout colour change the look of tiled flooring?
Grout that closely matches a tile makes the joints less prominent; a contrasting shade makes the tile pattern stand out. Compare grout samples beside the exact tile, since surrounding finishes can affect how the combination looks. For example, strong contrast can emphasise a grid, while a closer match gives the floor a more continuous appearance. Consider the effect across the whole room.
How do I coordinate flooring with cabinetry?
Compare the floor sample with the actual cabinet finish, not just its colour description. Look at their undertones together: a warm-toned cabinet may look different beside a cool grey floor than beside a natural-looking finish. Check the combination under the room’s usual lighting, then view it alongside wall and door colours. This helps you create a coordinated palette without requiring every surface to match exactly.
How can I protect new flooring during renovation work?
Plan floor protection around the remaining work, especially if painting, carpentry or appliance installation will follow. Keep grit and debris off exposed surfaces, and avoid dragging tools or furniture across finished flooring. Tell everyone working in the flat which areas are complete and need protection. A simple room-by-room handover between trades helps reduce accidental marks while renovation continues.
Should flooring be planned around built-in cabinets?
Yes. Decide how flooring and cabinetry will meet before work begins, and mark cabinet footprints on the room plan. This clarifies which edges will remain visible and where finishing details matter most. Consider future changes too: fixed cabinetry can limit access to the floor beneath it. Include cabinet positions in the flooring layout so the finished edges look intentional.
Can tile layout make a floor feel more structured?
Yes. A straight layout gives the joints a regular grid, while a staggered arrangement creates a different visual rhythm. Review the pattern in relation to the tile’s shape and the room’s boundaries. A small drawing can show how cuts will fall near walls and doorways, helping you assess the overall pattern before committing to the room’s layout.
What details should a flooring plan record?
Record the selected finish for each room, the direction of the planks or tile lines, and the intended transition points. Mark doorways, fixed cabinets and edges that meet another surface. Note which rooms share a continuous design and where the finish changes. A clear plan gives the installation team a common reference and helps you review the intended result before work starts.
Related Articles
27
Oct
Choosing tiles for an HDB flat, from overlay options to flooring costs
Choosing tiles for HDB flat? Compare overlay options, porcelain, ceramic and vin...

26
Oct
BTO Key Collection: A Reference for Your Next Steps
Find out bto key collection what to do next: inspect defects, plan renovation, a...
25
Oct
Soundproofing for HDB Apartments: Flooring and Other Examples
Explore soundproofing for HDB apartments, from SPC and LVT flooring to ceilings,...
24
Oct
Elderly-Friendly HDB Toilet Design: What Will Upgrades Cost
Plan the safest elderly-friendly toilet design HDB flat layout with proper seat ...
23
Oct
Home office ideas for small hdb room that make shared work easier
Discover smart home office ideas for small HDB room setups. Learn how to arrange...
22
Oct
5 layout and storage ideas for a 4-room BTO master bedroom
Plan the ideal master bedroom design for 4-room bto flats. Discover 5 practical ...